
How to Choose a Hoop That Fits Your Wall, Space, and Game
Compare mini, full-size and institutional options, then assess wall structure, backboard size, extension, clearance and mounting requirements.
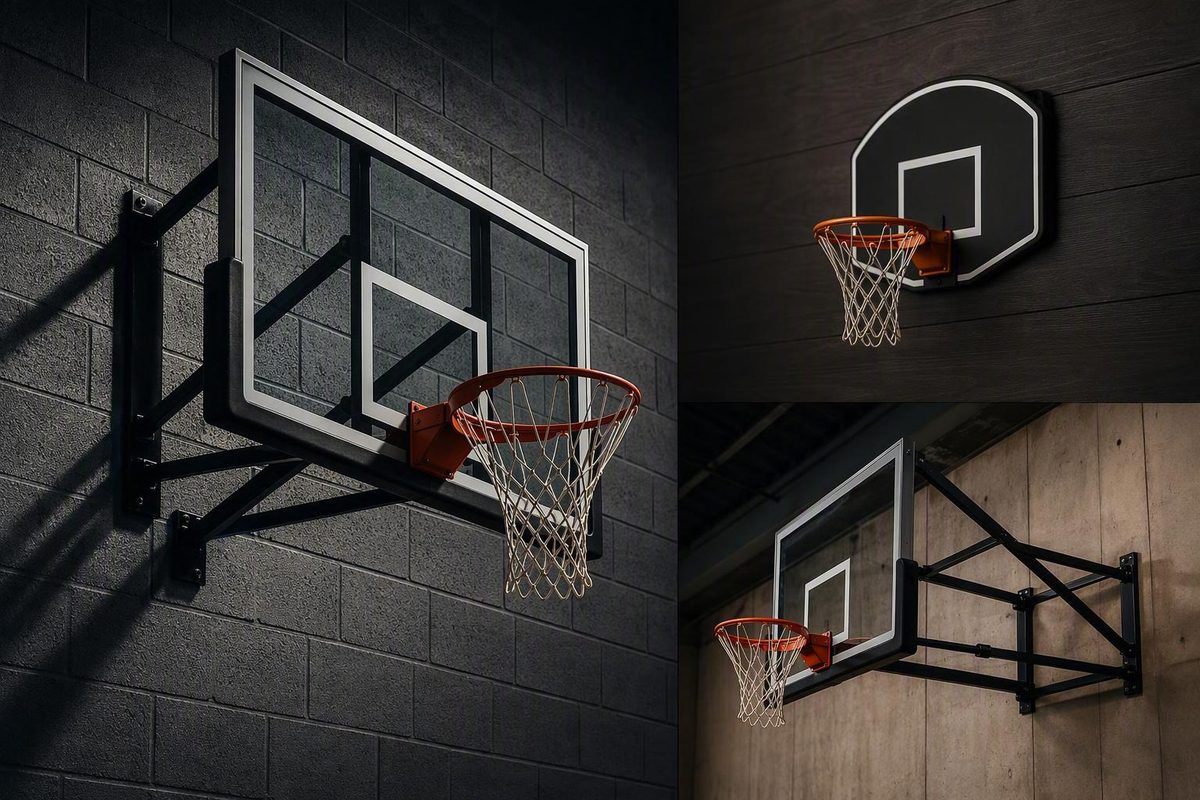
Choose the wall basketball hoop category before comparing materials, sizes, or prices. A mini hoop suits compact indoor recreation, a full-size residential system suits driveway practice, and an institutional backstop suits a school or gym. In every category, the bracket must be compatible with the building structure, and the playing area must provide enough height, extension, and clearance. If you cannot identify the supporting structure or follow the selected model’s installation instructions, stop before buying or drilling.
Start here: choose the right wall-hoop category
These three categories may look similar in photographs, but they are built for different settings and levels of play.
| Decision point | Indoor mini hoop | Residential full-size hoop | Institutional backstop |
|---|---|---|---|
| Typical setting | Bedroom, basement, office, playroom, compact indoor shooting area | Driveway, garage exterior, home court | School, club, recreation center, multi-sport gym |
| Intended play | Casual recreation and close-range shooting | Full-size practice and family play | Organized practices, games, or dedicated shooting stations |
| Rim and backboard scale | Smaller-than-regulation rim and compact board | Full-size rim; board sizes range from compact residential options to regulation width | Full-size components selected for court and competition needs |
| Mounting complexity | Usually the simplest category, but still needs suitable framing or masonry | Heavy assembly requiring structural attachment and substantial clearance | Engineered installation coordinated with the court, wall, padding, and facility operations |
| Adjustment options | Usually fixed; model dependent | Fixed or height adjustable | Fixed-height, adjustable, fixed-extension, or folding configurations |
| Do competition specifications matter? | No; it is not intended to reproduce regulation play | Useful as training references, but not automatically required | Potentially; the competition level and governing body control |
JustInTyme Sports lists mini-hoop models with 12-inch and 13.5-inch rims, both substantially smaller than a full-size ring. These examples show why “wall mounted” does not mean “regulation sized.” Mini-hoop specifications do not establish suitability for regulation play, dunking, or hanging from the rim. Follow the permitted-use instructions for the exact product rather than relying on its appearance or marketing photographs. See the manufacturer’s listed mini-hoop configurations.
It keeps a pole or weighted base out of the playing area, but the wall, roofline, driveway position, windows, and garage-door movement all become part of the installation plan.
Institutional backstops belong in a separate planning class. A school or gym must coordinate the backboard position, wall extension, court alignment, padding, operating clearance, and installation method. A multi-sport facility may also need the assembly to fold toward the wall when another activity uses the floor.
Use this quick path:
- Casual indoor play: Start with a mini hoop.
- Driveway training on a full-size target: Start with a residential full-size system.
- School, club, or organized facility: Start with an institutional backstop.
Do not treat the categories as interchangeable. A larger-looking mini hoop does not become a residential training system, and a residential bracket should not be used as an institutional backstop without the required design and installation documentation.
When a wall-mounted hoop makes sense
A wall-mounted hoop bolts to a building structure. This avoids placing a pole or weighted base in the playing area, which can help on a compact driveway or at a dedicated indoor shooting station. The tradeoff is permanent attachment: the building, rather than a base or concrete footing, must support the system.
| System | Construction and structural dependence | Space and mobility | Common setting |
|---|---|---|---|
| Wall mounted | Bracket attaches permanently to the building | No pole or base on the ground; not readily movable | Garage, indoor shooting station, gym wall |
| Portable | Uses a weighted base; no permanent construction | Base occupies floor or ground space; unit can be repositioned | Driveway or gym needing flexibility |
| In-ground | Pole requires a designed concrete footing | Fixed location; pole occupies ground space | Residential court or dedicated outdoor area |
A wall mount makes particular sense when:
- a driveway is too compact for a conveniently placed pole or base;
- an indoor area needs a fixed shooting target;
- a garage or exterior wall can support the selected residential system; or
- a multi-sport gym needs a fixed or folding backstop aligned with its court.
Portable goals use weighted bases and require no permanent construction, while in-ground systems require concrete footings. Wall systems bolt to the building and therefore depend on its suitability. These are construction differences, not evidence that one category is inherently more stable than every other option. First Team’s commercial guide distinguishes these mounting configurations.
Stop point: If you cannot identify a suitable supporting structure, do not improvise an attachment through drywall, siding, veneer, or an unknown wall assembly. Consider a portable system, a properly designed in-ground system, another location, or professional assessment of the proposed wall.
Checkpoint 1: determine whether the wall is suitable
The visible surface does not necessarily tell you what can support a hoop. Drywall may conceal wood or metal framing.
Use this structural-readiness decision tree:
-
Can you positively identify the wall assembly? - Yes: Continue to the next question. - No: Obtain a qualified assessment or choose another location.
-
Does the selected model permit installation on that assembly? - Yes: Verify bracket dimensions, attachment points, fasteners, and clearances. - No: Choose another location or hoop. - Unclear: Ask the manufacturer and, where appropriate, a qualified installer or structural professional.
-
Is the structural material accessible, sound, and aligned with the bracket? - Yes: Proceed to model-specific verification. - Uncertain: Obtain professional assessment. - No: Choose another location or hoop type.
For wood framing, identify both edges and the centerline of every required stud. The bracket must attach to the framing as the hoop manufacturer directs; drywall is not the supporting structure. Standard drywall anchors alone should not carry a heavy bracket, backboard, and rim. Finding two studs is not enough by itself—the bracket geometry must match their positions, the specified fasteners must be suitable, and the framing must be sound. General wall-hoop installation guidance recommends centered framing and model- and substrate-appropriate hardware.
For masonry, first determine what “brick” or “concrete” means at your site:
- Verified solid masonry may be a candidate if the model permits it.
- Hollow concrete block requires a substrate-specific fastening design.
- Brick veneer should not be assumed to provide structural support.
- Damaged brick, block, or concrete needs assessment before drilling.
- Weak or deteriorated mortar should not be treated as equivalent to sound masonry.
- Siding may conceal framing, sheathing, masonry, or another assembly; it is not itself proof of structural support.
General installation guidance recommends avoiding deteriorated mortar and matching the fastening system to the verified substrate, bracket, hoop load, and expected conditions. Unknown framing, metal framing, veneer, hollow masonry, damaged walls, and other nonstandard assemblies should be assessed by a qualified installer or structural professional. Review the substrate and wall-condition cautions before selecting an attachment method.
JustInTyme Sports suggests spanning studs with boards when stud spacing does not match certain brackets in its mini-hoop range. That is a product-family example, not a universal solution for mismatched framing. Do not select board dimensions, fasteners, or attachment details unless the manufacturer of your model approves the arrangement for your wall.
Checkpoint: Advance only when you can identify the structure, confirm that the selected model permits that structure, and place every required attachment point where the manufacturer specifies.
Checkpoint 2: compare backboard, rim, and size
Once the category, wall, and location pass the first checkpoint, compare the components that affect play. Material descriptions generally come from retailers or manufacturers rather than controlled independent testing, so treat them as broad shopping guidance—not guaranteed performance.
| Material | Retail positioning | Main tradeoff |
|---|---|---|
| Tempered glass | Professional-level option associated with gym-like bounce and spin | Heavier and typically more expensive |
| Acrylic | Lighter and less expensive than glass | Rebound characteristics can differ from glass |
| Polycarbonate | Durable and weather-resistant option | Actual rebound and long-term durability remain product specific |
These descriptions follow DICK’S Sporting Goods’ retailer guidance. They do not prove that every board made from one material will outperform every board made from another.
Common full-size backboard widths fall into three useful groups:
- 44 to 54 inches: Compact boards with a smaller physical footprint.
- 60 inches: A midpoint between compact residential boards and regulation width.
- 72 inches: Regulation width, subject to the complete dimensions and construction requirements of the applicable rules.
A full-size rim is approximately 18 inches across. DICK’S guide also describes rectangular boards as providing more bank-shot surface, while fan-shaped boards occupy less space. See the retailer’s material, size, shape, and rim comparisons.
A larger board gives players more usable area for bank shots. No width is automatically right for every driveway. Measure the site and evaluate the complete system instead of choosing by board width alone.
For serious practice, prioritize:
- usable bank-shot area;
- a rim height suited to the training goal;
- enough wall-to-backboard extension for the approach and court layout; and
- a mounting system compatible with the verified structure.
Backboard width cannot compensate for poor positioning, insufficient extension, or inadequate playing clearance.
Checkpoint 3: choose fixed, adjustable, or folding hardware
The mounting mechanism determines more than rim height. It affects wall projection, operating space, moving parts, and whether the area can be recovered for another use.
| Mechanism | Best fit | Main limitation |
|---|---|---|
| Fixed height | Players using one rim height; mechanically straightforward setup | Does not serve users who need multiple heights |
| Height adjustable | Families, youth programs, or mixed-height players | Adjustment range, operating clearance, and wall requirements must fit the site |
| Fixed extension | Dedicated court or shooting position with a known backboard location | Cannot retract to recover space |
| Folding wall mount | Multi-sport gym needing the assembly moved toward the wall | Hinges, locks, and cranks add moving components and model-specific care |
Extension distance is the distance from the wall to the face of the backboard. Select it from the actual court or shooting-area layout rather than estimating from product photographs.
Measure the proposed extension against:
- court markings and endline position;
- the player’s approach space;
- doors and garage-door tracks;
- rooflines, lights, windows, and structural projections;
- parked vehicles and pedestrian routes; and
- the movement envelope of an adjustable or folding assembly.
First Team lists commercial wall-mount configurations with extensions from 12 to 144 inches, depending on the model. Its 12-inch-extension system is described as a shooting-station or practice-wall configuration rather than a full-court setup. This is a manufacturer-specific example showing why extension must be selected, not a universal minimum or cutoff. Review First Team’s listed wall-mount extension configurations.
A folding institutional mount can move the assembly toward the wall when another sport needs the floor. Before selecting one, map both its playing position and its complete folding path. Confirm who may operate it, where its crank or controls will be located, and what model-specific inspection and operating instructions apply.
Measure the site before choosing a model
Complete this worksheet using the actual playing surface as your reference. Do not estimate from a garage slab, wall course, or nearby floor if the player will shoot from another elevation.
| Measurement or condition | Your site |
|---|---|
| Intended rim height from the actual playing surface | ______ |
| Backboard width × height | ______ |
| Intended position of the backboard face | ______ |
| Bracket footprint on the wall | ______ |
| Stud centers or verified usable masonry area | ______ |
| Wall-to-backboard extension | ______ |
| Operating space for height adjustment | ______ |
| Full movement envelope for folding hardware | ______ |
| Ceiling and overhead clearance | ______ |
| Clear approach area in front of the rim | ______ |
| Driveway slope between the hoop and shooting positions | ______ |
| Distance to windows and doors | ______ |
| Garage-door and track clearance | ______ |
| Distance to lights, rooflines, gutters, and projections | ______ |
| Clearance from parked vehicles | ______ |
| Pedestrian and entry routes | ______ |
| Moisture or drainage exposure | ______ |
| High-heat or direct-sun exposure | ______ |
| Freeze-thaw exposure | ______ |
| Other weather or corrosion conditions | ______ |
| Landlord permission confirmed | ☐ |
| HOA or property-manager approval confirmed | ☐ |
| Municipal or governing-body requirements checked | ☐ |
A sloped driveway can change the effective rim height relative to the player’s shooting position. If you measure only from the surface directly beneath the rim, but the player shoots from a higher or lower part of the driveway, the target will play higher or lower from that position. Record the slope and measure with the actual shooting surface in mind.
For its Mini Pro range, JustInTyme Sports recommends at least 24 inches between the top of the rim and the ceiling, describes a 6-foot rim as typical beneath an 8-foot ceiling, and advises against mounting its mini rims above 8.5 feet. These are manufacturer-specific limits for that mini-hoop family, not universal measurements for other mini hoops or full-size systems. Check the Mini Pro installation guidance for height, stud spacing, tools, and installer count.
Do not order until the proposed model’s bracket drawing fits the completed worksheet. Backboard dimensions alone will not show whether the bracket clears a roofline, the rim reaches the intended position, or an adjustable or folding mechanism can operate.
Plan installation without guessing at the hardware
Use the selected model’s instructions for fastener type, size, spacing, embedment, torque, bracket orientation, permitted wall construction, assembly sequence, and installer count. There is no universal bolt size, anchor capacity, drilling depth, or torque setting for every wall basketball hoop.
Masonry hardware must be rated for the verified substrate. Fasteners supplied or specified for wood framing must not automatically be reused on concrete, brick, or block. For example, JustInTyme Sports says not to use the SPAX PowerLags supplied with its mini hoops on concrete, brick, or block; it directs buyers to hardware rated for the applicable masonry. That instruction applies to its products, while the documentation for your selected model remains controlling.
A typical Mini Pro wall-mount tool list includes a drill, level, stud finder, wrench, ratchet, Phillips screwdriver, and specified drill bit. Do not treat this as a universal list. Full-size and institutional systems may require different lifting, drilling, access, alignment, or assembly equipment.
Use two people whenever the manufacturer requires it and whenever an assembly is heavy, awkward, or difficult to hold level while fastening. JustInTyme Sports recommends two people when attaching its larger Mini Pro 2.0 model to the wall and for all of its two-stud mounts. Follow the manufacturer’s model-specific installation and staffing guidance.
Escalate the job to a qualified installer or structural professional when it involves:
- a full-size residential system without clear structural documentation;
- an institutional backstop;
- unknown or metal framing;
- brick veneer or another cladding system;
- hollow masonry;
- cracked, deteriorated, corroded, or moisture-damaged construction;
- a bracket that does not align with the specified structure; or
- a conflict between the proposed method and the manufacturer’s instructions.
Stop before drilling if any check fails:
- ☐ The wall substrate has not been positively identified.
- ☐ Cracks, loose masonry, rot, corrosion, or other damage are visible.
- ☐ The bracket misses the specified framing or usable masonry area.
- ☐ The required model- and substrate-specific hardware is unavailable.
- ☐ Rim, backboard, approach, or operating clearances remain unresolved.
- ☐ The instructions conflict with the proposed location or installation method.
After installation, verify that the backboard and rim are level, the hardware is secure, and the bracket does not move at the wall. Look for new cracking or surface damage. Confirm that the rim, adjustment system, and folding mechanism—if present—operate only as the manufacturer describes. Add padding where the product, facility setting, or applicable governing requirements call for it, then recheck the playing clearance.
Ongoing visual checks should cover:
- loose or missing hardware;
- movement at the bracket or attachment points;
- corrosion;
- new or expanding wall cracks;
- damage to the backboard, rim, or adjustment components; and
- torn, displaced, or deteriorated padding.
Use the manufacturer’s service and inspection directions rather than inventing a universal maintenance interval.
Regulation dimensions are a reference, not a residential installation plan
Regulation dimensions can help a serious player reproduce a familiar target, but they do not establish whether a residential wall can carry a bracket or whether a driveway provides enough clearance.
Under FIBA’s equipment rules valid from October 1, 2024:
- the top of the ring is 3,050 mm above the floor, with a maximum tolerance of plus or minus 6 mm;
- the ring has an inside diameter of 450–459 mm; and
- the backboard measures 1,800 mm horizontally by 1,050 mm vertically, subject to the additional tolerances stated in the rules.
FIBA’s competition-equipment requirements also address mounting, support rigidity, ring design, pressure-release rings where required, nets, and padding. These provisions work together as an equipment specification. Copying only the rim height or backboard width does not create a regulation installation. Consult FIBA’s 2024 equipment rules for the complete specifications and tolerances.
FIBA venue guidance permits wall- or ceiling-mounted backstops below elite Level 1 competition, while elite Level 1 competition requires approved mobile or floor-fixed units. For Level 2 wall- or ceiling-mounted units, the guidance calls for at least one metre of unobstructed space from the edge of the endline to a wall or other obstruction. That is a competition-venue requirement, not a universal residential clearance formula. FIBA’s Venue Guide explains the competition-level and clearance distinctions.
Facilities should use the current official rules, applicable national governing-body requirements, the selected equipment manufacturer’s documents, and qualified venue professionals. Residential buyers may use competition dimensions as a training reference, but installation still depends on the chosen model, wall assembly, playing surface, and available space.
The final decision has three checkpoints:
- Select the correct category: Mini hoop, residential full-size system, or institutional backstop.
- Confirm the site: Verify that the wall and playing area satisfy the selected model’s structural and clearance requirements.
- Compare features only after those checks pass: Then choose the backboard material and size, rim design, adjustment system, extension, and folding capability.
Stop before purchase or drilling if the wall construction is uncertain, the required clearance is unavailable, or the manufacturer’s instructions cannot be followed. Obtain qualified structural or installation advice—or choose a portable, in-ground, or differently located hoop instead.