
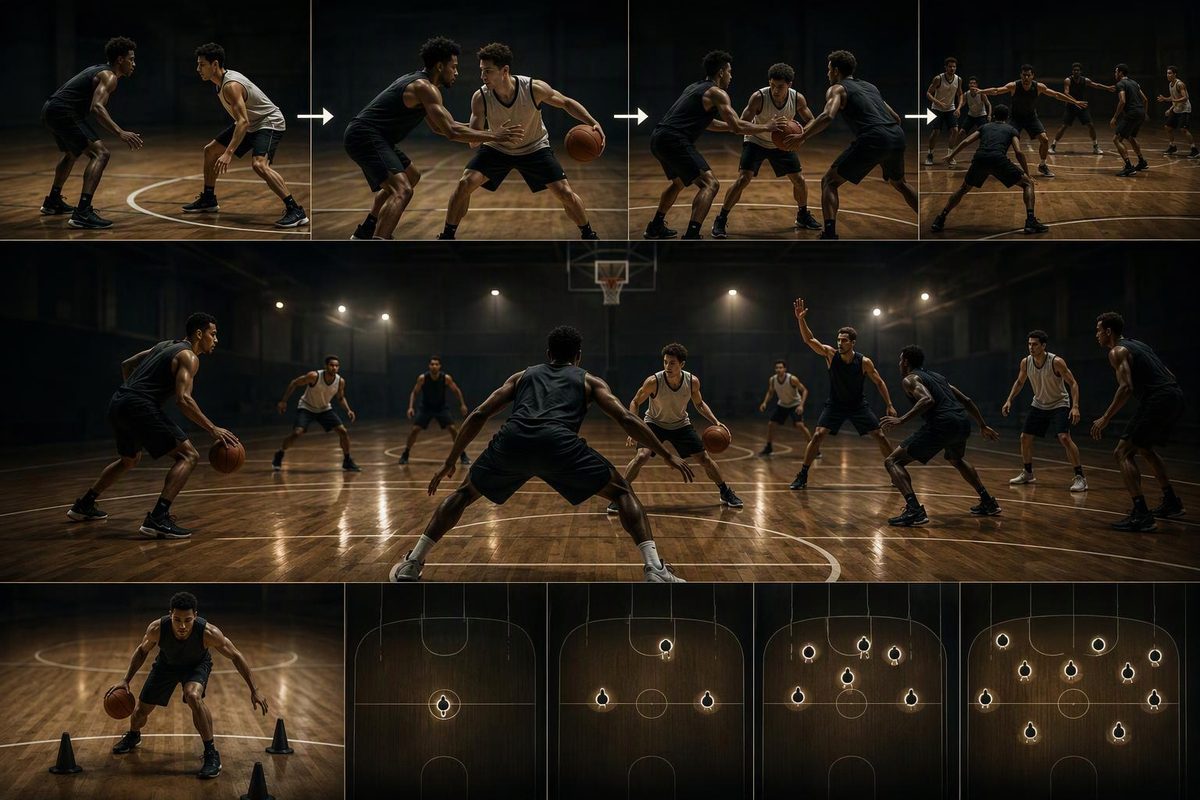
High pressing in basketball usually means full-court pressure or a full-court press: the defense picks up the offense early rather than waiting at half court. Teach it in layers—contain the ball, force it toward a sideline, trap only on a planned cue and rotate behind the trap. The first objective is not necessarily a steal; making the ball handler change direction, spend time and enter a planned area can create the rushed pass or turnover.
Choose the age group, local rule and last completed checkpoint to get the next practice step.
Press Practice Planner
The recommendation applies the listed USA Basketball age guidance, your local rule selection and the progression checkpoints.
For ages 12–14, the USA Basketball guideline allows pressing and double-teaming, except when a team leads by 25 or more. Your competition may use a different rule.
Source: NBA/USA Basketball Youth Basketball Guidelines and the four-phase practice progression in this article. The cited age rules apply to those guidelines and events; local rules control local competition.
Check Your League’s Pressing Rules First
Youth rules vary. The NBA/USA Basketball guidelines recommend:
- Ages 7–8: no pressing or double-teaming.
- Ages 9–11: player-to-player defense may extend full court only in the fourth period and extra periods, but double-teaming and crowding remain prohibited.
- Ages 12–14: pressing and double-teaming are allowed, except that a team leading by 25 or more should not press.
These are national development guidelines and the rules used in NBA/USA Basketball events. They do not replace your competition’s rulebook. Confirm the local restrictions before teaching or using traps (USA Basketball Youth Basketball Guidelines).
Start With One Press Rule
Use one rule for a basic matchup press:
Keep the ball out of the middle, guide it toward a sideline and trap only on the agreed cue.
A sideline limits the dribbler’s available space. The FIBA/WABC coaching manual recommends setting double teams near a sideline, baseline or halfway line. It also tells trappers to stay close enough to prevent a split and to keep their hands high rather than reaching for the ball (FIBA/WABC Level 2 Coaches Manual).
Choose one trapping cue before practice. It could be:
- a reverse dribble near the sideline;
- a catch in a backcourt corner;
- an advance toward halfway along a sideline.
Do not let every defender invent a trap. An unplanned double-team leaves an offensive player open without an organized rotation behind the ball.
Give All Five Defenders a Job
Exact assignments depend on the press, but a basic matchup framework has five jobs:
- Ball defender: Angle the receiver away from the middle and apply pressure without reaching.
- First helper: Discourage the pass up the same sideline and become the second trapper on the cue.
- Middle defender: Protect the center and anticipate the next pass.
- Backside defender: Move toward the middle as the ball moves away, ready to intercept a diagonal pass.
- Safety: Stay behind the pressure and protect the basket.
All five defenders move when the ball moves. An NFHS coaching resource calls this “five on a string” and identifies controlling the ball as a constant in every press. It also distinguishes aggressive pressure from containment intended mainly to make the offense spend time advancing the ball (NFHS, “Defining Your Full-Court Press”).
The safety cannot chase the same pass as the front line. If the press is broken, that defender’s first responsibility is to delay the ball and protect the basket while teammates sprint back.
Phase 1: Turn the Dribbler in 1-On-1
Setup: Mark a lane 12–15 feet wide beside one sideline. The ball handler starts on the baseline. The defender begins about an arm’s length away, shaded slightly toward the middle.
Action: The ball handler tries to reach half court. The defender retreats under control, then runs when necessary to regain the angle. To produce a turn, get directly in front with your head aligned with the ball and your chest facing the dribbler. The FIBA/WABC manual emphasizes reaching the required position rather than insisting on one type of footwork (FIBA/WABC Level 1 Coaches Manual).
The defender should not slide after the dribbler has gained a clear speed advantage. Run to recover the angle, then return to a balanced stance before contact becomes likely.
Checkpoint: Force two legal changes of direction before half court on three consecutive repetitions. Do not count a repetition if the defender holds, bumps or opens a direct route to the middle.
Common miss — lunging for a steal: Reaching stops the defender’s feet and gives the dribbler an escape route. Use the cue “chest first, hands second.” Keep your chest in the driving lane and both hands visible. High-school defenders should also know the current limits on hand-checking and displacement.
Phase 2: Close the Trap in 2-On-2
Setup: Use one half of the court’s width. Place a receiver up the sideline with a defender discouraging that pass.
Action: The ball defender channels the dribbler toward the sideline. On the chosen cue, the helper closes from ahead of the ball while the original defender closes the retreat route from the side and behind.
The trappers should:
- arrive together;
- stop under control;
- close the seam without stepping into the ball handler;
- keep high, active hands;
- avoid leaning, grabbing or reaching across the body.
The two defenders are forming one barrier, not taking separate chances at the ball. A gap between them invites a split; uncontrolled contact turns useful pressure into a foul.
If the dribbler escapes, both defenders move immediately. One contains the ball while the other recovers toward the open receiver. FIBA’s guidance warns that if only one trapper moves, a gap opens for the dribbler (FIBA/WABC Level 2 Coaches Manual).
Checkpoint: Complete five traps in which the ball handler cannot split the defenders and neither defender fouls. Do not count steals caused by reckless reaching.
Phase 3: Add the Interceptor in 3-On-3
Add a second receiver and defender. The first two defenders execute the same trap. The third defender moves between the trap and the basket, near the middle, where they can see both possible receivers.
Use these starting constraints:
- the offense gets no more than three dribbles;
- the offense stays within one half of the court’s width;
- the defense gets one point for a forced retreat, two for an interception and three for a violation;
- the offense gets two points for crossing half court under control.
This scoring rewards containment instead of gambling. A possession can be defensively successful even when it does not end in a steal.
Checkpoint: On four of five possessions, the third defender reaches the middle passing lane before the trap closes. Advance when that defender moves while the pass is developing, not after the receiver catches it.
Phase 4: Connect the Press in Live 5-On-5
Start each possession from a made basket or dead-ball inbound. Give the defense one sequence to follow:
- Influence the first catch toward a sideline.
- Turn the dribbler once.
- Trap only on the designated cue.
- Rotate toward the ball while keeping a safety behind it.
- Sprint back if the offense breaks the press.
- Flow into the team’s half-court defense.
Play six-possession rounds. Track middle advances allowed, legal traps completed and layups conceded. Do not judge the press only by steals. A press that produces occasional interceptions but repeatedly allows direct middle drives or uncontested layups is not functioning as designed.
If the offense breaks the first line, stop chasing from behind. The nearest defender contains the ball, the safety protects the basket and the other three defenders recover inside the ball before matching up.
Use the Solo Version for Ball-Defender Footwork
You cannot rehearse five-player rotations alone, but you can train the ball defender’s movement.
Place two shoes or cones 8–10 feet apart. Start in a defensive stance facing an imaginary dribbler. Slide from the middle marker toward the sideline marker, retreat two quick steps, then run at an angle to get your chest back in front. Finish balanced with both hands visible.
Work for 20 seconds, rest for 40 seconds and complete three rounds in each direction.
Checkpoint: Film from the front if possible. Pass the drill when you stay balanced during the slide, move both feet to change position and finish in the imagined driving lane without lunging forward.