
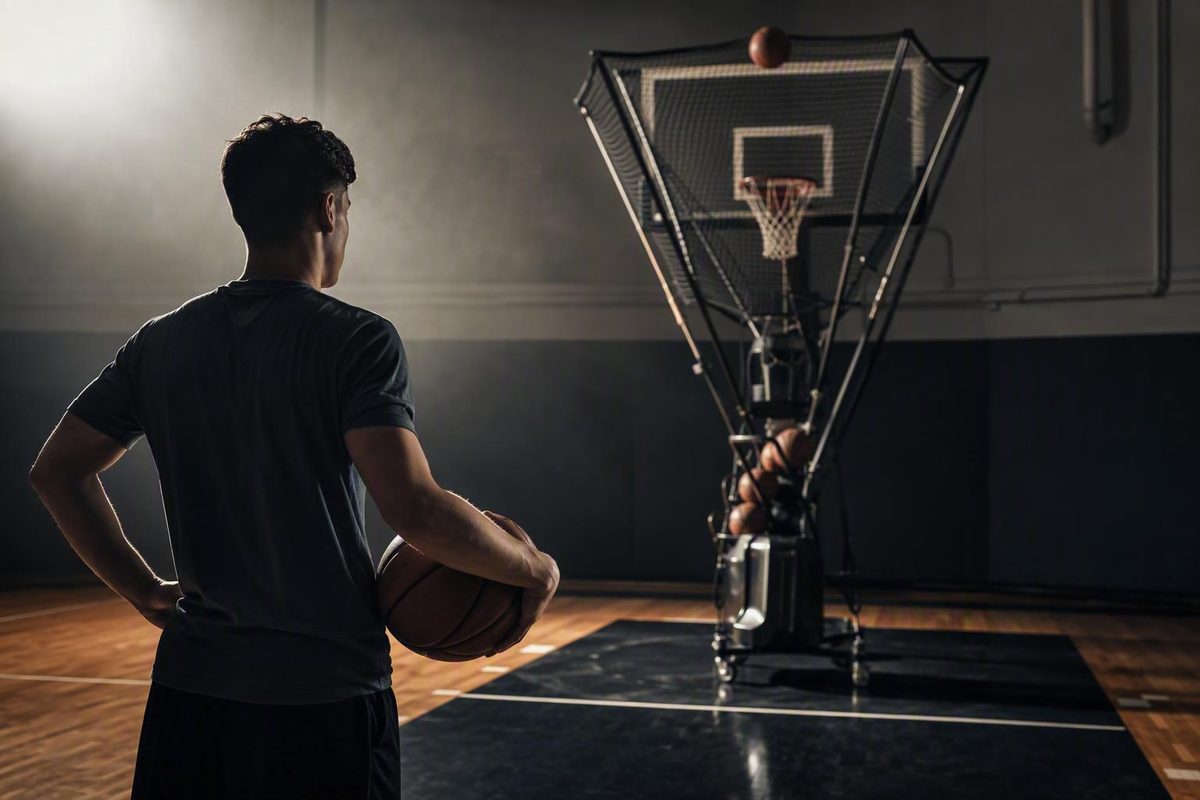
You probably need a basketball shooting machine only if you practice alone regularly, already have repeatable close-range mechanics, can follow a structured workout, and have enough court and storage space to use the equipment consistently. The machine captures made or missed shots and returns or passes the ball, reducing time spent retrieving rebounds. It can create more uninterrupted repetitions, but it cannot guarantee sound form or transfer those repetitions to games.
The short answer: what a shooting machine does and who it suits
A basketball shooting machine sits beneath or around the basket, collects the ball through a net or rebound system, and redirects it to the shooter. Depending on the model, that return may roll down a manual ramp, arrive as a powered pass to one location, or move automatically among programmed spots.
That makes the machine useful for a specific problem: you want to practice alone without chasing every rebound. It does not solve every shooting problem. As practical coaching guidance, added repetitions are worth pursuing only while you can preserve the mechanics, footwork, pace, and purpose of the drill.
You are a strong candidate if you can answer yes to most of these statements:
- I practice alone often enough that rebounding consumes a meaningful part of each session.
- My close-range stance, shot path, guide hand, release, and follow-through are reasonably stable.
- I know which fixed-location, movement, or game-speed workouts I will run.
- My court has enough room for the machine without removing the shooting angles I need.
- I have a realistic plan for setup, power, movement, and protected storage.
- I will slow the feed or move closer when technique deteriorates.
A beginner who is still rebuilding stance, shot path, elbow position, guide-hand use, or release may be better served initially by close-range form shooting, wall work, video, or a partner. A machine can send the next pass quickly, but that pace may work against a player who needs time to inspect and correct each repetition.
Makes, misses, and shooting percentage are outcome information—not mechanical feedback. Those numbers cannot identify whether your feet were balanced, your guide hand interfered, your elbow moved outside the ball, or your release flattened under fatigue.
Written instruction and equipment share the same limitation: neither replaces an in-person coach who can observe the repetition. Basketball How’s progression-based approach is intended to make solo work more purposeful, not to substitute for qualified observation.
Choose the right class of equipment before comparing brands
Do not begin with brand rankings. First decide whether you need a manual return trainer, a portable powered returner, or a facility-grade programmable system.
| Equipment class | Best fit and core function | Practical tradeoffs |
|---|---|---|
| Manual rebound-and-return trainer | A solo player who mainly wants the ball redirected after each shot. It typically does not provide powered passes, programming, automatic spot changes, or analytics. | Often lighter, simpler, and less expensive than the powered examples discussed here, but with limited control over pass timing and location. Avoid if powered catches and relocation drills are central to the plan. |
| Portable powered returner | A home user who wants powered passes while retaining some ability to fold, wheel, or store the unit. Passing control and analytics vary by model. | Check weight, folded size, wheels, power, setup, and whether direction changes are manual or automatic. Avoid paying for powered return if handling or storage will prevent regular use. |
| Facility-grade programmable system | A school, club, trainer, or household that will use programmed locations, statistics, displays, multiplayer modes, or team administration. | The named examples are substantially heavier and more demanding to deliver, move, power, and store. Avoid program-level functions when one player simply needs the next pass. |
A manual trainer is the simplest option for a player who mainly wants fewer retrievals. In a current commercial comparison, GRIND lists the Dr. Dish IC3 at $499.99 and 35 pounds and describes it as a manual rebound trainer with a 180-degree return ramp rather than an app-connected system. Because that information comes from a competing manufacturer, confirm the current price and specifications with the original seller before ordering (GRIND comparison guide, accessed September 20, 2026).
A portable powered machine occupies the middle ground. GRIND lists its model at 110 pounds, with a stored footprint of 38 by 13 by 18 inches, two wheels, and nine passing positions. Direction changes are made manually at the base, and the machine does not record makes and misses. The same page lists outlet power rather than battery operation. Powered return, automatic spot changes, and shot tracking are therefore separate functions—not interchangeable descriptions of automation (GRIND product page, accessed September 20, 2026).
Facility systems may add drill programming, screens, statistics, multiplayer tracking, and team-management tools. The Dr. Dish CT+, for example, is listed at 296 pounds. That is an attributed specification for one machine, not a standard weight for the category (Dr. Dish CT+ setup instructions, accessed September 20, 2026).
The decision rule is simple: buy the least complicated class that supports your recurring workouts. Do not pay for team accounts, multiplayer statistics, heatmaps, or a large drill library if your main need is receiving the next pass during individual practice. Treat every displayed price as a time-sensitive seller listing rather than a permanent market price.
Compare the functions that materially change a workout
Product pages often group several capabilities under labels such as “automatic,” “smart,” or “advanced.” Break those labels into individual functions before comparing machines.
| Function | What it changes | What to verify |
|---|---|---|
| Ball capture | Reduces retrieval of makes and misses | Net coverage, hoop compatibility, close-range clearance |
| Manual or powered return | Determines whether the ball rolls back or arrives as a powered pass | Pass consistency, ball capacity, power source |
| Passing locations | Expands the spots from which you can receive the ball | Number and usable range of locations |
| Automatic location changes | Supports relocation drills without stopping | Whether changes occur automatically within a drill |
| Pass interval | Controls recovery time and workout pace | Adjustment range and effect of using multiple balls |
| Passing distance | Changes where the catch arrives | Adjustment method and usable court depth |
| Drill programming | Repeats selected spots, timing, and goals | Custom versus preset drills; device or account requirements |
| Attempt counting | Records how many shots were taken | Whether every feed is counted correctly |
| Make-or-miss tracking | Records shot outcomes | Required sensor, attachment, app, membership, or configuration |
Ball capture and return are the baseline functions. Programmable multi-location passing becomes useful when you want to combine shooting with relocation, repeatable footwork, or a planned sequence of catches around the court.
Pay particular attention to the difference between available passing positions and automatic movement among positions. GRIND offers nine directions but requires the player to change the direction at the machine. Dr. Dish Home is advertised to pass automatically to multiple locations during one drill. Its app allows users to choose locations, ball count, tempo, and drill goal, while multiplayer mode can track up to three players. Full app operation requires suitable Wi-Fi or cellular service, and some promoted functions depend on membership (Dr. Dish Home product page, accessed September 20, 2026).
Attempt counting is not the same as shot tracking. The Swish Hoop Twister seller says the base machine counts attempts automatically, while tracking makes, misses, and swishes requires its Skills Trainer, an optional Shot Monitor, or the PRO configuration. That distinction matters if statistics are a primary reason for buying rather than an incidental extra (Swish Hoop Twister product page, accessed September 20, 2026).
At the facility end, Shoot-A-Way’s Gun range shows how far the feature set can expand. Depending on the model, the manufacturer advertises programmable locations, built-in drills, screens, heatmaps, companion apps, and multiplayer statistics. These tools may help a program organize several players, but their presence does not make a machine automatically better for a solo user (Shoot-A-Way product catalog, accessed September 20, 2026).
Rank features by the workouts you will perform every week:
- Will you mostly shoot from one fixed spot?
- Will you relocate between two or more spots without stopping?
- Do you need a specific pass interval or distance?
- Will you review attempt totals or actual makes and misses?
- Will multiple players maintain separate records?
- Will someone consistently manage the app, accounts, and drill setup?
Simple, reliable returns may matter more than leaderboards or a large drill library. Do not compare advertised shots-per-hour figures as standardized benchmarks. Sellers use different ball counts, feed intervals, court layouts, and often unspecified test conditions.
Run a driveway and home-court fit audit
Map the complete operating footprint before ordering. A machine may fit beneath the hoop while its net, passing range, power cord, or remaining shooting lanes make the intended workout impractical.
Use this pre-purchase measurement checklist:
- Usable court width: Measure the angles available after the machine and net are installed.
- Shooting depth: Confirm that the remaining court supports your intended close, midrange, and long-distance spots.
- Hoop and backboard compatibility: Check the pole, extension arms, rim, backboard, padding, and mounting geometry.
- Capture-net height: Compare the extended net with the backboard, roof, branches, lights, garage door, and overhead wires.
- Close-range clearance: Determine whether you can shoot near the basket without contacting the net or altering your motion.
- Ground condition: Identify slopes, cracks, thresholds, and transitions that could complicate positioning.
- Doorway width and height: Measure the narrowest point on the storage route, not just the final storage room.
- Turns and thresholds: Account for corners, steps, gates, door tracks, and floor-level changes.
- Storage area: Reserve a dry, protected location for the folded machine, accessories, electrical equipment, and mobile device.
- Power access: Confirm the exact model’s electrical requirements and the route from the approved outlet.
- Operating route: Make sure players can move around the machine without tangling with cords or stored equipment.
“Portable” is not a complete handling specification. Check total weight, folded dimensions, wheel design, lifting requirements, vehicle-loading method, and whether one or two adults are needed. The difference can be substantial: GRIND lists its machine at 110 pounds, while the 296-pound Dr. Dish CT+ setup instructions recommend that two adults remove that model from its pallet.
Power arrangements also vary. GRIND requires a standard outlet and is not battery-powered. Some newer seller-listed machines advertise cordless operation, but battery runtime, charging time, replacement availability, and performance under actual operating conditions should be confirmed for the exact configuration before purchase.
If software is part of the decision, check:
- Wi-Fi strength at the basket
- Cellular service if Wi-Fi is unavailable
- Supported phones or tablets
- Current operating-system requirements
- Required app accounts
- Whether the machine works without an active membership
- Which features stop working when a membership ends
- Whether several players can maintain separate profiles
Outdoor-capable does not mean weatherproof. Dr. Dish Home is promoted for outdoor training but must be kept away from wet weather. A New Zealand retailer likewise says the ProShot 180 may be operated outdoors for a session but must be stored indoors (ProShot 180 product page, accessed September 20, 2026).
Net geometry deserves special attention if close-range form shooting is important. In a January 2020 review, one Shoot-A-Way 10000 owner said the capture net was most useful for shots beyond approximately 12 feet because it interfered with closer attempts. The reviewer also offered a referral incentive, so this should be treated as one commercially interested owner’s experience—not a universal minimum distance (Shoot-A-Way 10000 owner review).
Finally, consult instructions for the exact model and production version. Dr. Dish maintains separate manuals and assembly resources for current, retired, and older equipment, including a separate IC3 manual for units purchased before June 2024 (Dr. Dish product-manual index, accessed September 20, 2026). Do not assume that instructions for a similarly named machine transfer unchanged to yours.
Calculate the full ownership cost, not just the sticker price
The checkout price is only one line in the budget. Complete this worksheet before comparing offers:
| Cost item | Your estimate |
|---|---|
| Base machine price | $ |
| Sales tax or equivalent | $ |
| Delivery or freight | $ |
| Liftgate, pallet, or placement service | $ |
| Assembly | $ |
| Required accessories | $ |
| Cart, wheels, or outdoor cover | $ |
| App or membership fees | $ per year |
| Extension cord or other electrical equipment | $ |
| Mobile device, if required | $ |
| Extended coverage | $ |
| Protected storage preparation | $ |
| Routine maintenance | $ per year |
| Expected replacement parts | $ |
| Return freight contingency | $ |
| Estimated first-year total | $ |
Sticker prices become misleading when delivery methods differ. Dr. Dish Home separately lists curbside delivery charges, while GRIND offers several delivery methods. Compare the delivered, assembled, and usable setup rather than two isolated base prices.
Read detailed warranty language instead of relying on the largest headline. GRIND’s product text lists a one-year standard warranty while also advertising separately available extended coverage. Check the current limited-warranty document for covered components, exclusions, claim procedures, labor, shipping, accidental-damage language, and geographic restrictions.
Before paying, ask the seller:
- Is there a trial or return period?
- When does that period begin?
- Who pays return freight?
- Must the machine be returned on a pallet or in its original packaging?
- Is on-site repair available?
- Which replacement parts can owners install?
- How long are parts expected to remain available?
- Does warranty service apply at my location?
- What happens to app functions if the product or service is discontinued?
- Can an order be canceled before shipment?
Treat preorders as a separate purchase category. HOOPTEQ currently presents its machine as a $799 preorder, says units are scheduled to ship in 2027, and states that orders are refundable before shipment, with shipping billed separately closer to the ship date (HOOPTEQ preorder page, accessed September 20, 2026). The Swish Hoop page also uses preorder language but displays a shipping statement without identifying a year. A preorder specification describes a seller’s planned configuration; it is not evidence of demonstrated durability, compatibility, or long-term performance.
Immediately before purchase, verify the current price, inventory or preorder status, shipping schedule, cancellation terms, subscription costs, warranty documents, and support arrangements directly with the seller. Save copies of the applicable terms and your exact product configuration.
Use a form-first progression instead of chasing a repetition total
A good machine workout begins without the machine. The practical goal is to add speed, distance, and volume only while the player can preserve the same basic motion.
Stage 1: mechanics without the machine
Start close to the basket, where you do not need extra force. Review:
- Balanced feet and a stable base
- A continuous shot path
- The ball resting on the finger pads
- The shooting elbow beneath the ball
- A passive guide hand
- A clean release
- A held follow-through
Basketball How’s shooting progression moves from three to five and then eight feet and recommends 50 close-range makes as one instructional option, not a universal requirement (Basketball How shooting-form guide).
Use a readiness checkpoint before turning on the machine. Breakthrough Basketball’s drill guidance suggests sound technique on nine of the final 10 wall shots and eight makes in 10 attempts from each close-range spot (Breakthrough Basketball shooting drills). These are one publisher’s instructional targets, not validated standards for every player. Adjust them for age, ability, hoop height, strength, and the mechanical task being addressed.
Stage 2: fixed-location catches
Set the machine to return the ball to one spot. Begin at a controlled tempo that leaves enough time to catch, organize the feet, complete the shot, and briefly assess the repetition.
Record a short sample from the side and another from the front. A few representative repetitions may show whether the ball path, balance, guide hand, or landing changes once the machine establishes a rhythm. Video does not explain every miss, but it gives you something more useful than outcome statistics alone when reviewing mechanics.
Choose one technique cue for the set.
Example:
- 10 controlled attempts from one close-range spot
- Brief video review
- 10 more attempts using one selected correction
- Move to a second spot only if the motion remains stable
Stage 3: movement into the catch
Add one repeatable footwork pattern: either a one-two step or a hop. Keep the pass location fixed until you can arrive balanced without shuffling or readjusting.
Next, add relocation between selected spots. The movement should have a clear route and purpose rather than becoming hurried running around the arc. Increase shooting distance only after the close-range motion remains stable through the catch and rise.
A simple sequence is:
- Start beneath the rim or near the lane.
- Relocate to the selected spot.
- Arrive with the chosen footwork.
- Catch in balance.
- Shoot with the same continuous path.
- Hold the finish.
- Return along the same route.
Stage 4: controlled game-speed work
Only now should you shorten the pass interval, introduce fatigue, or add a simple decision cue. Possible cues include shooting versus driving on a signal, relocating after a simulated pass, or changing footwork according to the catch angle.
Predictable machine passes help isolate execution. They do not reproduce every imperfect pass, defender, spacing problem, or decision found in a game. Use the machine for controlled repetition, then add a partner or live play when the workout requires variability.
Apply a clear regression rule throughout the session:
If the player begins readjusting the feet, drifting, involving the guide hand, flattening the release, or breaking the continuous shot path, slow the feed or move closer.
Do not force completion of a volume target after the motion changes. Treat the target as adjustable and restore the intended technique before increasing difficulty again.
Keep a compact workout log:
| Location | Attempts and makes | Tempo and footwork | One technique note |
|---|---|---|---|
| Right midrange | 20 attempts, 13 makes | Controlled, one-two | Feet narrowed late |
| Top | 20 attempts, 15 makes | Controlled, hop | More vertical landing |
| Left wing | 15 attempts, 9 makes | Faster, one-two | Guide hand became active |
Record makes only when they can be measured accurately. The technique note should come from observation or video; machine statistics do not diagnose it.
When a lower-cost alternative is the better decision
A shooting machine is not the first step in learning to shoot. If your primary task is building mechanics, close-range self-rebounding work and wall shooting let you pause, inspect the motion, and make corrections without being rushed by the next feed.
A partner is the more flexible choice when you need varied passes, verbal cues, immediate observation, closeouts, or decisions. A partner can intentionally change pass height and location, stop the drill when technique slips, and create situations that a predictable return cannot.
A manual rebound-and-return trainer is the practical middle ground when you want fewer retrievals but do not need powered passes, automatic programming, apps, or analytics. It addresses the rebounding problem without adding as much complexity as the powered examples discussed above.
Postponing a powered machine is also reasonable when:
- The driveway is too narrow or short for the planned locations.
- The hoop or backboard geometry is incompatible.
- The capture net disrupts essential close-range work.
- There is no dry, protected storage area.
- Moving or loading the machine would be difficult.
- Outlet access or connectivity is unreliable.
- Solo practice is infrequent.
- The full ownership cost would strain the budget.
- The player does not yet have a specific machine-based workout plan.
Use this final five-question test:
- Are the player’s mechanics stable enough for added volume?
- Will the player use the machine consistently?
- Does the court fit the machine and the intended shooting locations?
- Can the equipment be moved, powered, and stored properly?
- Does the chosen model provide functions the player will actually use?
Four or five yes answers support continued product research. Several no answers point toward a wall, partner, manual returner, video review, or continued close-range progression first.
The right basketball shooting machine is the simplest system that supports your actual weekly workouts, fits the court and storage route, and leaves room in the budget for the full ownership cost. If form remains unstable or the equipment will be difficult to house and use consistently, keep building the motion before investing in powered automation.